1. 解耦合发展史、控制反转、依赖注入
1.1 开发Spring程序(IOC)
1
2
3
| ApplicationContext context = new ClassPathXmlApplicationContext("applicationContext.xml")
Student student = (Student)context.getBean("student");
|
可以发现,springioc容器 帮我们 new 了对象,并且给对象赋了值
1.2 SpringIOC发展史
1.2.1 new对象
1
2
| Student student = new Student();
student.setXxx();
|
1.2.2 简单工厂
1
2
| MyFactory myFactory = new MyFactory();
myFactory.learn(String name);
|
1
2
3
4
5
6
7
8
9
10
11
12
| public class CourseFactory {
public static ICourse getCourse(String name) {
ApplicationContext context = new ClassPathXmlApplicationContext("applicationContext.xml");
if(name.equals("java")) {
return (ICourse) context.getBean("javaCourse");
}else {
return (ICourse) context.getBean("HtmlCourse");
}
}
}
|
1.2.3 ioc(超级工厂)
- 先配置
applicationContext.xnl文件中的<bean>标签中的student、javaCourse、`htmlCourse``
- ``student`类中添加方法:
1
2
3
4
5
6
| public void learn(String name) {
ApplicationContext context = new ClassPathXmlApplicationContext("applicationContext.xml");
ICourse course = (ICourse) context.getBean(name);
course.learn();
}
|
1
2
3
4
5
6
7
8
| public static void learnCourseWithIoc() {
ApplicationContext context = new ClassPathXmlApplicationContext("applicationContext.xml");
Student student = (Student) context.getBean("student");
student.learn("javaCourse");
}
public static void main(String[] args) {
learnCourseWithIoc();
}
|
1.3 IOC也可以称为DI(依赖注入)
控制反转:将 创建对象、属性值 的方式 进行了 翻转,从new、setXxx() 翻转为了 从springIOC容器 getBean()
依赖注入:将属性值注入给了属性,将属性注入给了bean,将bean注入给了ioc容器;
总结:ioc/di, 无论要什么对象, 都可以去springioc容器中获取, 而不需要自己操作(new/setXxx())
2. 三种方式的依赖注入
IOC容器赋值:
简单类型:8个基本+String
value:如果是对象类型
ref:“需要引用的id值”
因此实现了 对象与对象之间的 依赖关系
1
| context.getBean(需要获取的bean的id值)
|
2.1.1 .set注入:通过setXxx()赋值
赋值,默认使用的是set()方法;
依赖注入底层是通过反射实现对的。
2.2.2 构造器注入:通过构造方法赋值
1
| <constructor-arg value="ls" type="String" name="name" ></constructor-arg>
|
需要注意:如果<constructor-arg> 的顺序 与构造方法参数的顺序不一致,则需要通过type或者index或name指定
2.2.3 p命名空间的注入
引入命名空间
1
2
3
| <beans
xmlns:p="http://www.springframework.org/schema/p">
</beans>
|
注意多个 p 赋值的时候 要有空格。
注意:无论是String还是in/short/long, 在赋值时都是 value="值"
因此建议此种情况 需要配合name\type进行区分
3. 集合和特殊类型注入
3.1 集合类型注入
示例:
注入各种数据类型:List、Set、map、properties
1
2
3
4
5
6
7
8
9
10
11
12
13
14
15
16
17
18
19
20
21
22
23
24
25
26
27
28
29
30
31
32
33
34
35
36
37
38
39
40
41
42
43
44
45
46
47
48
49
50
51
52
53
54
55
56
57
58
59
60
61
62
63
64
65
66
67
68
69
70
71
| <bean id="collectionDemo" class="org.student.entity.AllCollectionType">
<property name="list">
<list>
<value>足球</value>
<value>篮球</value>
<value>乒乓球</value>
</list>
</property>
<property name="array">
<list>
<value>足球1</value>
<value>篮球1</value>
<value>乒乓球1</value>
</list>
</property>
<property name="set">
<list>
<value>足球2</value>
<value>篮球2</value>
<value>乒乓球2</value>
</list>
</property>
<property name="map">
<map>
<entry>
<key>
<value>foot3</value>
</key>
<value>足球3</value>
</entry>
<entry>
<key>
<value>basket3</value>
</key>
<value>篮球3</value>
</entry>
<entry>
<key>
<value>pp3</value>
</key>
<value>乒乓球3</value>
</entry>
</map>
</property>
<property name="props">
<props>
<prop key="foot4">足球4</prop>
<prop key="basket4">篮球4</prop>
<prop key="pp4">乒乓球4</prop>
</props>
</property>
</bean>
|
被注入的对象
1
2
3
4
5
6
7
8
9
10
11
12
13
14
15
16
17
18
19
20
21
22
23
24
25
26
27
28
29
30
31
32
33
34
35
36
37
38
39
40
41
42
43
44
45
46
47
48
49
50
51
52
53
54
55
56
57
58
59
60
61
62
63
64
65
66
67
| package org.student.entity;
import java.util.List;
import java.util.Map;
import java.util.Properties;
import java.util.Set;
public class AllCollectionType {
private List<String> list;
private String[] array;
private Set<String> set;
private Map<String, String> map;
private Properties props;
public List<String> getList() {
return list;
}
public void setList(List<String> list) {
this.list = list;
}
public String[] getArray() {
return array;
}
public void setArray(String[] array) {
this.array = array;
}
public Set<String> getSet() {
return set;
}
public void setSet(Set<String> set) {
this.set = set;
}
public Map<String, String> getMap() {
return map;
}
public void setMap(Map<String, String> map) {
this.map = map;
}
public Properties getProps() {
return props;
}
public void setProps(Properties props) {
this.props = props;
}
@Override
public String toString() {
String strContent = "";
for(String str : array) {
strContent += str + ",";
}
return "list:" + this.list + "set:" + this.set + "map:" + this.map + "pros:" + this.props + "array:" + strContent;
}
}
|
3.2 特殊值的注入
1
2
3
| <property name="name">
<null/>
</property>
|
1
2
3
| <property name="name">
<value></value>
</property>
|
注意: 在ioc中定义bean的前提:该bean的 类 必须提供了 无参构造
4. 自动装配
只适用于 ref类型,约定由于配置
自动配置:
1
2
3
4
5
6
7
8
9
10
11
12
13
14
15
| <bean id="course" class="org.student.entity.Course" autowire="constructor">
<property name="courseName" value="java"></property>
<property name="courseHour" value="200"></property>
</bean>
<bean id="teacher" class="org.student.entity.Teacher">
<property name="name" value="zs"></property>
<property name="age" value="21"></property>
</bean>
|
byName:自动寻找其他bean的id值 = 该Course类的属性名
byName本质是byId
1
| <bean class="org.student.entity.Course" autowire="byName"></bean>
|
byType:其他bean的类型class是否与该Course类的ref属性类型一致
注意:此种方法必须满足当前IOC容器中, 只能有一个bean满足条件
constructor:其他bena的类型(class)是否与 该course类的构造方法参数的类型一致,此种方式的本质就是byType
可以在头文件中一次性将ioc容器中的所有bean统一设置成自动装配:
1
2
3
| <beans xmlns="http://www.springframework.org/schema/beans"
default-autowire="default"
></beans>
|
自动装配虽然可以减少代码量,但是会降低程序的可读性,使用时需要谨慎。
5. 使用注解声明式事务
使用注解定义bean:通过注解的形式将bean以及相应的属性值放入ioc容器
1
2
| <context:component-scan base-package="org.student.dao">
</context:component-scan>
|
spring在启动的时候,会根据base-package在 该包中扫描所有类,查找这些类是否有标明注解,有注解就将它注入ioc容器中
头文件:
1
2
3
| <beans
xmlns:context="http://www.springframework.org/schema/context"
xsi:schemaLocation="http://www.springframework.org/schema/context http://www.springframework.org/schema/context/spring-context-4.3.xsd">
|
@Componment细化:
dao层注解:@Respository
service层注解:@Service
控制器层注解:@Controller
使用注解实现事务(声明是事务)
目标:通过事务使以下方法 要么全成功,要么全失败
1
2
3
4
5
| public void addStudent() {
}
|
5.1 jar包
1
2
3
4
5
6
| spring-tx-4.3.9.RELEASE.jar
ojdbc.jar
commons-dbcp.jar
commons-pool.jar
spring-jdbc-4.3.9.RELEASE.jar
aopalliance.jar
|
5.2 配置
jdbc\mybatis\spring
增加事务命名空间
1
2
3
| <beans
xmlns:tx="http://www.springframework.org/schema/tx"
xsi:schemaLocation="http://www.springframework.org/schema/tx http://www.springframework.org/schema/tx/spring-tx-4.3.xsd">
|
- 增加对事务的支持:依赖
<bean id="txManager"/>
1
2
|
<tx:annotation-driven transaction-manager="txManager"/>
|
- 配置事务管理器
txManager依赖的jar包:spring-jdbc-4.3.9.RELEASE.jar 依赖<bean id="dataSource"/>
1
2
3
4
|
<bean id="txManager" class="org.springframework.jdbc.datasource.DataSourceTransactionManager">
<property name="dataSource" ref="dataSource"></property>
</bean>
|
- 配置数据库相关事务:依赖
jar包(commons-dbcp.jar 连接池使用的数据源)
1
2
3
4
5
6
7
8
9
|
<bean id="dataSource" class="org.apache.commons.dbcp.BasicDataSource">
<property name="driverClassName" value="oracle.jdbc.OracleDriver"></property>
<property name="url" value="jdbc:oracle:thin@127.0.0.1:1521:ORCL"></property>
<property name="username" value="scott"></property>
<property name="password" value="tiger"></property>
<property name="maxActive" value="10"></property>
<property name="maxIdle" value="6"></property>
</bean>
|
5.3 使用
将需要成为事务的方法前增加注解
1
| @Transactional(readOnly = false, propagation = Propagation.REQUIRED)
|
6. AOP 面向切面编程
一个普通的类 -> 有特定功能的类
1
2
| public class MyFilter extends/implements Xx {
}
|
6.1 前置通知
需要头文件
1
2
3
| <beans
xmlns:aop="http://www.springframework.org/schema/aop"
xsi:schemaLocation="http://www.springframework.org/schema/aop http://www.springframework.org/schema/aop/spring-aop-4.3.xsd">
|
1
2
| aopaliance.jar
aspectjweaver.jar
|
- 配置
addStudent()方法和前置通知类的bean
1
2
3
4
5
6
7
8
9
|
<bean id="studentService" class="org.student.service.impl.StudentServiceImpl">
<property name="studentDao" ref="studentDao"></property>
</bean>
<bean id="logBefore" class="org.student.aop.LogBefore">
</bean>
|
- 将
addStudent()方法和前置通知类关联
1
2
3
4
5
6
7
|
<aop:config>
<aop:pointcut expression="execution(public void org.student.service.impl.StudentServiceImpl.deleteStudent(int)) or execution(public void org.student.service.impl.StudentServiceImpl.addStudent(org.student.entity.Student))" id="pointcut"/>
<aop:advisor advice-ref="logBefore" pointcut-ref="pointcut"/>
</aop:config>
|
aop:每当执行add()之前自动执行一个方法log()
add():业务方法
log():自动执行的通知,即aop前置通知
如果出现异常:类似java.lang.NoClassDefFoundError:org/apach....则说明缺少jar类
6.2 后置通知
将业务类、通知 纳入springIOC容器
定义切入点(一端)、定义通知类(另一端),通过pointcut-ref将两端连接起来
- 配置
addStudent()方法和 后置通知类的bean
1
2
3
4
5
6
7
|
<bean id="studentService" class="org.student.service.impl.StudentServiceImpl">
<property name="studentDao" ref="studentDao"></property>
</bean>
<bean id="logAfter" class="org.student.aop.LogAfter">
</bean>
|
1
2
3
4
5
6
7
|
<aop:config>
<aop:pointcut expression="execution(public * org.student.service.impl.StudentServiceImpl.addStudent(..))" id="pointcut2"/>
<aop:advisor advice-ref="logAfter" pointcut-ref="pointcut2"/>
</aop:config>
|
6.3 异常通知
根据异常通知接口的定义可以发现,异常通知的实现类必须编写以下方法:
1
2
| void afterThrowing(Mehthod, args, target, ThrowableSubclass)
void afterThrowing(ThrowableSubclass)
|
- 配置
addStudent()方法和后置通知类的bean
1
2
3
4
5
6
|
<bean id="studentService" class="org.student.service.impl.StudentServiceImpl">
<property name="studentDao" ref="studentDao"></property>
</bean>
<bean id="logException" class="org.student.aop.LogException"></bean>
|
1
2
3
4
5
6
|
<aop:config>
<aop:pointcut expression="execution(public * org.student.service.impl.StudentServiceImpl.addStudent(..))" id="pointcut3"/>
<aop:advisor advice-ref="logException" pointcut-ref="pointcut3"/>
</aop:config>
|
6.4 环绕通知
在目标方法的前后、异常发生时、最终等各个地方都可以进行的通知,最强大的一个通知;
可以获取目标方法的全部控制权(目标方法是否执行、执行之前、执行之后、参数、返回值等)
在使用环绕通知时,目标方法的一切信息都可以通过invocation参数获取的
- 配置
addStudent()方法和后置通知类的bean
1
2
3
4
5
6
|
<bean id="studentService" class="org.student.service.impl.StudentServiceImpl">
<property name="studentDao" ref="studentDao"></property>
</bean>
<bean id="logAround" class="org.student.aop.LogAround"></bean>
|
- 将2.将
addStudent()方法和前置通知类关联
1
2
3
4
5
6
|
<aop:config>
<aop:pointcut expression="execution(public * org.student.service.impl.StudentServiceImpl.addStudent(..))" id="pointcut4"/>
<aop:advisor advice-ref="logAround" pointcut-ref="pointcut4"/>
</aop:config>
|
7. 基于注解形式的AOP实现
使用注解实现通知aop
jar包
与实现接口 的方式相同
配置
将业务类、通知纳入springIOC容器
开启注解AOP的支持
1
| <aop:aspectj-autoproxy></aop:aspectj-autoproxy>
|
业务类addStudent – 通知
编写
1
2
3
| @Aspect
public class LogBeforeAnnotation {
}
|
注意:通过注解形式将对象增加到ioc容器时,需要设置扫描器
1
| <context:component-scan base-package="org.student.aop"></context:component-scan>
|
扫描器会将指定的包中的@Componet、@Service、@Responsitory、@Controller修饰的类产生的对象增加到 ioc 容器中
@Aspect 不需要加入扫描器,只需要开启即可:
1
| <aop:aspectj-autoproxy></aop:aspectj-autoproxy>
|
通过注解形式 实现的aop,如果想获取目标对象的一些参数,则需要使用一个对象:JoinPoint
7.1 前置通知
1
2
3
4
5
|
@Before("execution(public * addStudent(..))")
public void myBefore(JoinPoint jp) {
System.out.println("《注解形式:前置通知》:目标对象:" + jp.getTarget() + ",方法名:" + jp.getSignature() + ",参数列表:" + Arrays.toString(jp.getArgs()));
}
|
7.2 后置通知
1
2
3
4
5
|
@AfterReturning( pointcut = "execution(public * addStudent(..))", returning = "returningValue" )
public void myAfter(JoinPoint jp, Object returningValue) {
System.out.println("《注解形式:后置通知》:目标对象:" + jp.getTarget() + ",方法名:" + jp.getSignature() + ",参数列表:" + Arrays.toString(jp.getArgs()) + ",返回值:" + returningValue);
}
|
7.3 环绕通知
1
2
3
4
5
6
7
8
9
10
11
12
13
14
15
16
17
18
|
@Around("execution(public * addStudent(..))")
public void myAround(ProceedingJoinPoint jp) {
System.out.println("《注解形式:环绕通知:方法执行之前》");
try {
System.out.println("《注解形式:环绕通知:方法执行时》");
jp.proceed();
System.out.println("《注解形式:环绕通知:方法执行之后》");
}catch(Throwable e) {
System.out.println("《注解形式:环绕通知:发生异常时》");
}finally {
}
}
|
7.4 异常通知
1
2
3
4
5
|
@AfterThrowing( pointcut = "execution(public * addStudent(..))", throwing = "e" )
public void myException(NullPointerException e) {
System.out.println("&&&&&《注解形式:异常通知:》异常信息:" + e.getMessage());
}
|
7.5 最终通知
1
2
3
4
5
|
@After("execution(public * addStudent(..))")
public void myAfter(JoinPoint jp) {
System.out.println("《注解形式:最终通知:》");
}
|
8. 基于 Schema 形式的 AOP
通过配置将 类 → 通知
基于Schema配置类似于实现接口的方式
如果要获取目标对象信息:
注解、schema:JoinPoint
接口:Method method, Object[] args, Object target
8.1 前置通知
schema形式和注解形式相似,不同之处:注解形式使用了注册@After, schemal形式进行了多余配置
1
2
3
| public void before(JoinPoint jp) {
System.out.println("《Sechema形式:前置通知》:目标对象:" + jp.getTarget() + ",方法名:" + jp.getSignature() + ",参数个数:" + jp.getArgs().length);
}
|
8.2 后置通知
1
2
3
| public void afterReturning(JoinPoint jp, Object returnValue) throws Throwable {
System.out.println("《Sechema形式:后置通知》:目标对象:" + jp.getTarget() + ",方法名:" + jp.getSignature() + ",参数个数:" + jp.getArgs().length + ",返回值:" + returnValue);
}
|
8.3 环绕通知
1
2
3
4
5
6
7
8
9
10
11
12
13
14
| public Object around(ProceedingJoinPoint jp) {
Object result = null;
try {
System.out.println("《Sechema形式:环绕通知》:前置通知");
result = jp.proceed();
System.out.println("《Sechema形式:环绕通知》:后置通知");
}catch(Throwable e) {
System.out.println("《Sechema形式:环绕通知》:异常通知");
}finally {
System.out.println("《Sechema形式:环绕通知》:最终通知");
}
return result;
}
|
8.4 异常通知
1
2
3
| public void whenException(JoinPoint jp, NullPointerException e) {
System.out.println("《Sechema形式:异常通知》:目标对象:" + jp.getTarget() + ",方法名:" + jp.getSignature() + ",参数个数:" + jp.getArgs().length +",异常信息:" + e.getMessage());
}
|
8.5 最终通知
1
2
3
| public void after(JoinPoint jp) {
System.out.println("《Sechema形式:最终通知》:目标对象:" + jp.getTarget() + ",方法名:" + jp.getSignature() + ",参数个数:" + jp.getArgs().length);
}
|
8.6 配置
对 5 种通知的统一配置
1
2
3
4
5
6
7
8
9
10
11
| <bean id="logSchema" class="org.student.aop.LogSchema"></bean>
<aop:config>
<aop:pointcut expression="execution(public * org.student.service.impl.StudentServiceImpl.addStudent(..))" id="pcSchema"/>
<aop:aspect ref="logSchema">
<aop:before method="before" pointcut-ref="pcSchema"/>
<aop:after-returning method="afterReturning" returning="returnValue" pointcut-ref="pcSchema"/>
<aop:after-throwing method="whenException" pointcut-ref="pcSchema" throwing="e"/>
<aop:around method="around" pointcut-ref="pcSchema"/>
</aop:aspect>
</aop:config>
|
9. Spring 开发 Web 项目
Spring开发Web项目及拆分Spring配置文件
Web项目如何初始化SpringIOC容器:思路:当服务启动时(tomcat),通过监听器将SpringIOC容器初始化一次
因此用spring开发web项目 至少需要7个jar:spring-java的6个jar + spring-web.jar,
注意: web项目的jar包 是存在WEB-INF/lib中
配置 web.xml 文件
核心代码:
1
2
3
4
5
6
7
8
9
10
11
12
13
|
<context-param>
<param-name>contextConfigLocation</param-name>
<param-value>classpath:applicationContext.xml</param-value>
</context-param>
<listener>
<listener-class>org.springframework.web.context.ContextLoaderListener</listener-class>
</listener>
|
完整 web.xml
1
2
3
4
5
6
7
8
9
10
11
12
13
14
15
16
17
18
19
20
21
22
23
24
| <?xml version="1.0" encoding="UTF-8"?><web-app xmlns:xsi="http://www.w3.org/2001/XMLSchema-instance" xmlns="http://java.sun.com/xml/ns/javaee" xsi:schemaLocation="http://java.sun.com/xml/ns/javaee http://java.sun.com/xml/ns/javaee/web-app_3_0.xsd" id="WebApp_ID" version="3.0">
<display-name>SpringWebProject</display-name>
<welcome-file-list>
<welcome-file>index.html</welcome-file>
<welcome-file>index.htm</welcome-file>
<welcome-file>index.jsp</welcome-file>
<welcome-file>default.html</welcome-file>
<welcome-file>default.htm</welcome-file>
<welcome-file>default.jsp</welcome-file>
</welcome-file-list>
<context-param>
<param-name>contextConfigLocation</param-name>
<param-value>classpath:applicationContext.xml</param-value>
</context-param>
<listener>
<listener-class>org.springframework.web.context.ContextLoaderListener</listener-class>
</listener>
</web-app>
|
10. 拆分Spring 配置文件
10.1 java项目
applicationContext1.xml
applicationContext2.xml
applicationContext3.xml
1
| ApplicationContext context = new ClassPathXmlApplicationContext("applicationContext.xml");
|
10.2 Web项目
根据什么拆分?
合并:如何将多个配置文件加载
在web中配置
三种方法:
1
2
3
4
5
6
7
8
9
10
|
<context-param>
<param-name>contextConfigLocation</param-name>
<param-value>
classpath:applicationContext.xml,
classpath:applicationContext-Dao.xml,
classpath:applicationContext-Service.xml,
classpath:applicationContext-Controller.xml
</param-value>
</context-param>
|
1
2
3
4
5
6
7
8
|
<context-param>
<param-name>contextConfigLocation</param-name>
<param-value>
classpath:applicationContext.xml,
classpath:applicationContext-*.xml
</param-value>
</context-param>
|
1
2
3
4
5
6
7
|
<context-param>
<param-name>contextConfigLocation</param-name>
<param-value>
classpath:applicationContext.xml
</param-value>
</context-param>
|
1
2
3
4
5
6
|
<beans>
<import resource="applicationContext-Dao.xml"/>
<import resource="applicationContext-Service.xml"/>
<import resource="applicationContext-Controller.xml"/>
</beans>
|
10.3 结构

11. Servlet 容器与 IOC 容器
核心代码:
1
2
3
4
|
ApplicationContext context = WebApplicationContextUtils.getWebApplicationContext(this.getServletContext());
studentService = (IStudentService) context.getBean("studentService");
|
servlet的init()函数在触发链接或访问servlet时才执行,执行完才执行method函数(doGet或doPost)
1
2
3
4
5
6
7
8
9
10
11
12
13
14
15
16
17
18
19
20
21
22
23
24
25
26
27
28
29
30
31
32
33
34
35
36
37
38
39
40
41
42
43
44
45
46
47
48
49
50
51
52
53
54
55
56
57
58
59
60
61
| package org.student.servlet;
import java.io.IOException;
import javax.servlet.ServletException;
import javax.servlet.annotation.WebServlet;
import javax.servlet.http.HttpServlet;
import javax.servlet.http.HttpServletRequest;
import javax.servlet.http.HttpServletResponse;
import org.springframework.context.ApplicationContext;
import org.springframework.context.support.ClassPathXmlApplicationContext;
import org.springframework.web.context.WebApplicationContext;
import org.springframework.web.context.support.WebApplicationContextUtils;
import org.student.service.IStudentService;
import org.student.service.impl.StudentServiceImpl;
@WebServlet("/queryStudentByIdServlet")
public class queryStudentByIdServlet extends HttpServlet {
IStudentService studentService;
public void setStudentService(IStudentService studentService) {
this.studentService = studentService;
}
@Override
public void init() throws ServletException {
ApplicationContext context = WebApplicationContextUtils.getWebApplicationContext(this.getServletContext());
studentService = (IStudentService) context.getBean("studentService");
}
protected void doGet(HttpServletRequest request, HttpServletResponse response) throws ServletException, IOException {
String name = studentService.queryStudentById();
request.setAttribute("name", name);
request.getRequestDispatcher("result.jsp").forward(request, response);
}
protected void doPost(HttpServletRequest request, HttpServletResponse response) throws ServletException, IOException {
doGet(request, response);
}
}
|
12. 注解形式的依赖注入
12.1 service
1
2
3
4
5
6
|
@Service("studentService")
public class StudentServiceImpl implements IStudentService {
@Autowired
@Qualifier("stuDao")
private IStudentDao studentDao;
|
1
2
3
4
5
6
7
8
9
10
| @Service("studentService")
public class StudentServiceImpl implements IStudentService {
<!--使用resource能对名字和类型进行匹配
要求:
1.必须有tomcat的支持(一般web才使用),
或者使用pom导入依赖javax.annotation
2.不需要写set方法来反射(xml配置的需要)
-->
@Resource(name = "stuDao")
private IStudentDao studentDao;
|
12.2 dao
1
2
3
|
@Repository("studentDao")
public class StudentDaoImpl implements IStudentDao{
|
12.3 servlet
1
2
3
4
|
@Controller("studentServlet")
@WebServlet("/queryStudentByIdServlet")
public class queryStudentByIdServlet extends HttpServlet {
|
13. Spring 整合 MyBatis 以及 SqlSessionDaoSupport 整合方式
Spring - MyBatis
13.1 思路
SqlSessionFactory → SqlSession → StudentMapper → CRUD
可以发现, MyBatis 最终是通过SqlSessionFactory来操作数据库,
Spring整合MyBatis其实就是 将 MyBatis的SqlSessionFactory交给Spring
SM整合步骤:
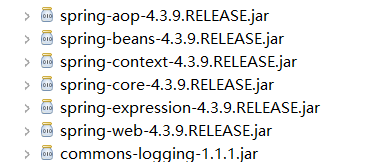
| mybatis-spring.jar |
spring-tx.jar |
spring-jdbc.jar |
spring-expression.jar |
| spring-context-support.jar |
spring-core.jar |
spring-context.jar |
spring-beanss.jar |
| spring-aop.jar |
spring-web.jar |
commons-logging.jar |
commons.dbcp.jar |
| ojdbc.jar mybatis.jar |
log4.jar |
commons-pool.jar |
|
现在整合的时候,需要通过Spring管理SqlSessionFactory,因此 产生SqlSessionFactory所需要的的数据库
信息不再放入conf.xml,而需要放入spring配置文件中
配置spring配置文件(applicationContext.xml)
13.2 目标
通过spring产生mybatis最终操作需要的 动态mapper对象(Student)
需要先配置applicationContext依赖注入bean
dao
不需要session的commit和close操作,自动提交
1
2
3
4
5
6
| @Override
public void addStudent(Student student) {
SqlSession session = super.getSqlSession();
StudentMapper studentMapper = session.getMapper(StudentMapper.class);
studentMapper.addStudent(student);
}
|
service
1
2
3
4
| @Override
public void addStudent(Student student) {
studentMapper.addStudent(student);
}
|
test
1
2
3
4
5
6
7
8
9
10
11
| public static void main(String[] args) {
ApplicationContext context = new ClassPathXmlApplicationContext("applicationContext.xml");
IStudentService studentService = (IStudentService) context.getBean("studentService");
Student student = new Student();
student.setStuNo(3);
student.setStuName("zds");
student.setStuAge(33);
studentService.addStudent(student);
}
|
13.3 图解
13.4 spring 配置文件
1
2
3
4
5
6
7
8
9
10
11
12
13
14
15
16
17
18
19
20
21
22
23
24
25
26
27
28
29
30
31
32
33
34
35
36
37
38
39
40
41
42
43
44
45
46
| <?xml version="1.0" encoding="UTF-8"?>
<beans xmlns="http://www.springframework.org/schema/beans"
xmlns:xsi="http://www.w3.org/2001/XMLSchema-instance"
xsi:schemaLocation="http://www.springframework.org/schema/beans http://www.springframework.org/schema/beans/spring-beans.xsd">
<bean id="config" class="org.springframework.beans.factory.config.PreferencesPlaceholderConfigurer">
<property name="locations">
<array>
<value>classpath:db.properties</value>
</array>
</property>
</bean>
<bean id="studentService" class="org.student.service.impl.StudentServiceImpl">
<property name="studentMapper" ref="studentMapper"></property>
</bean>
<bean id="studentMapper" class="org.student.dao.impl.StudentDaoImpl">
<property name="sqlSessionFactory" ref="sqlSessionFactory"></property>
</bean>
<bean id="dataSource" class="org.apache.commons.dbcp.BasicDataSource">
<property name="driverClassName" value="${driver}"></property>
<property name="url" value="${url}"></property>
<property name="username" value="${username}"></property>
<property name="password" value="${password}"></property>
<property name="maxActive" value="${maxActive}"></property>
<property name="maxIdle" value="${maxIdle}"></property>
</bean>
<bean id="sqlSessionFactory" class="org.mybatis.spring.SqlSessionFactoryBean">
<property name="dataSource" ref="dataSource"></property>
<property name="configLocation" value="classpath:conf.xml"></property>
<property name="mapperLocations" value="org/student/mapper/*.xml"></property>
</bean>
</beans>
|
13.5 Spring产生 动态mapper对象 有3种方法
第一种方法 - SqlSessionDaoSupport
Dao层实现类 继承 SqlSessionDaoSupport类
sqlSessionDaoSupport类提供了一个属性 SqlSession
1
2
3
4
|
<bean id="studentMapper" class="org.student.dao.impl.StudentDaoImpl">
<property name="sqlSessionFactory" ref="sqlSessionFactory"></property>
</bean>
|
sqlSession工厂bean
1
2
3
4
5
| <bean id="sqlSessionFactory" class="org.mybatis.spring.SqlSessionFactoryBean">
<property name="dataSource" ref="dataSource"></property>
<property name="configLocation" value="classpath:conf.xml"></property>
</bean>
|
数据源bean
1
2
3
4
5
6
7
8
| <bean id="dataSource" class="org.apache.commons.dbcp.BasicDataSource">
<property name="driverClassName" value="${driver}"></property>
<property name="url" value="${url}"></property>
<property name="username" value="${username}"></property>
<property name="password" value="${password}"></property>
<property name="maxActive" value="${maxActive}"></property>
<property name="maxIdle" value="${maxIdle}"></property>
</bean>
|
第二种方式 - MapperFactoryBean
省略掉 第一种方式的 实现类
直接使用MyBatis提供的 Mapper实现类:org.mybatis.spring.mapper.MapperFactoryBean
缺点:每一个mapper都需要一个
1
2
3
4
5
|
<bean id="studentMapper" class="org.mybatis.spring.mapper.MapperFactoryBean">
<property name="mapperInterface" value="org.student.mapper.StudentMapper"></property>
<property name="sqlSessionFactory" ref="sqlSessionFactory"></property>
</bean>
|
sqlSession工厂bean
1
2
3
4
5
6
| <bean id="sqlSessionFactory" class="org.mybatis.spring.SqlSessionFactoryBean">
<property name="dataSource" ref="dataSource"></property>
<property name="configLocation" value="classpath:conf.xml"></property>
</bean>
|
数据源bean
1
2
3
4
5
6
7
8
| <bean id="dataSource" class="org.apache.commons.dbcp.BasicDataSource">
<property name="driverClassName" value="${driver}"></property>
<property name="url" value="${url}"></property>
<property name="username" value="${username}"></property>
<property name="password" value="${password}"></property>
<property name="maxActive" value="${maxActive}"></property>
<property name="maxIdle" value="${maxIdle}"></property>
</bean>
|
批量配置实现类
1
2
3
4
5
|
<bean class="org.mybatis.spring.mapper.MapperScannerConfigurer">
<property name="basePackage" value="org.student.mapper"></property>
<property name="sqlSessionFactoryBeanName" value="sqlSessionFactory"></property>
</bean>
|
sqlSession工厂bean
1
2
3
4
5
6
| <bean id="sqlSessionFactory" class="org.mybatis.spring.SqlSessionFactoryBean">
<property name="dataSource" ref="dataSource"></property>
<property name="configLocation" value="classpath:conf.xml"></property>
</bean>
|
数据源bean
1
2
3
4
5
6
7
8
| <bean id="dataSource" class="org.apache.commons.dbcp.BasicDataSource">
<property name="driverClassName" value="${driver}"></property>
<property name="url" value="${url}"></property>
<property name="username" value="${username}"></property>
<property name="password" value="${password}"></property>
<property name="maxActive" value="${maxActive}"></property>
<property name="maxIdle" value="${maxIdle}"></property>
</bean>
|
注意:
第二种和第三种方式中:
第二种的sqlSession工厂sqlSessionFactory为对象类型,属性值用引用ref
第三种的sqlSession工厂sqlSessionFactoryBeanName是String类型,属性值用value
web 配置文件
1
2
3
4
5
6
7
8
9
10
11
12
13
14
15
16
17
18
19
20
21
22
23
24
25
26
27
28
29
30
31
32
| <?xml version="1.0" encoding="UTF-8"?>
<web-app xmlns:xsi="http://www.w3.org/2001/XMLSchema-instance" xmlns="http://java.sun.com/xml/ns/javaee" xsi:schemaLocation="http://java.sun.com/xml/ns/javaee http://java.sun.com/xml/ns/javaee/web-app_3_0.xsd" id="WebApp_ID" version="3.0">
<display-name>SpringWebProject</display-name>
<welcome-file-list>
<welcome-file>index.html</welcome-file>
<welcome-file>index.htm</welcome-file>
<welcome-file>index.jsp</welcome-file>
<welcome-file>default.html</welcome-file>
<welcome-file>default.htm</welcome-file>
<welcome-file>default.jsp</welcome-file>
</welcome-file-list>
<context-param>
<param-name>contextConfigLocation</param-name>
<param-value>
classpath:applicationContext-*.xml
</param-value>
</context-param>
<listener>
<listener-class>org.springframework.web.context.ContextLoaderListener</listener-class>
</listener>
</web-app>
|

